Install Ubuntu 18.04 LTS Bionic on Windows 10
Minimum System Requirements
- 4 GBs RAM
- i3 Core Processor
- VirtualBox
- Ubuntu
Setting up Virtual Box
The very first thing we need to do is the installation of the Virtual box on which we will be installing our Ubuntu OS. Then, simply go to this link And click download. Then click on Windows hosts then it should download you a virtual box.
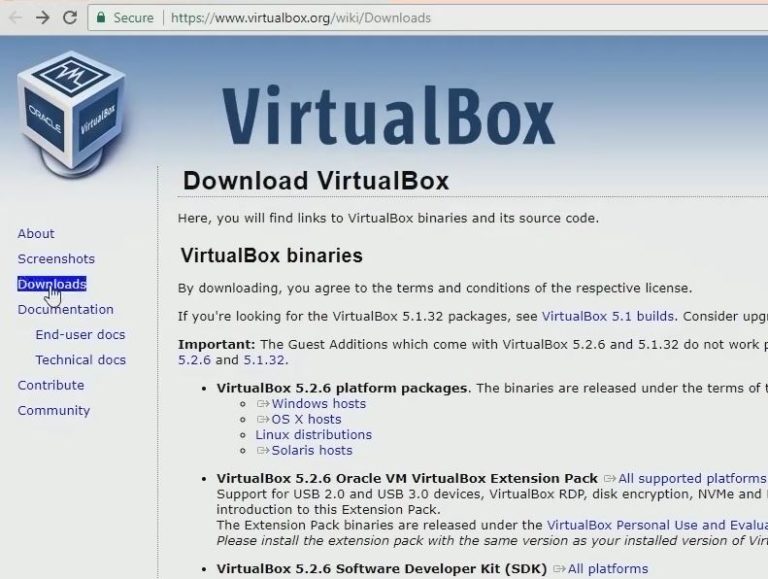
Once it has downloaded you can easily install it as simple setup process. And you guys can also see that I already have installed so I don’t need to download this. Now once your virtual box is ready then go to Ubuntu download link. As you can see Ubuntu 18.04.1 LTS is the newest version of the Ubuntu.

Now as a Linux is opensource to get this operating system running they are just simply asking you for the donation of little money as all human need money for their resources so it’s better to support opensource because at least your getting this good operating system for free.
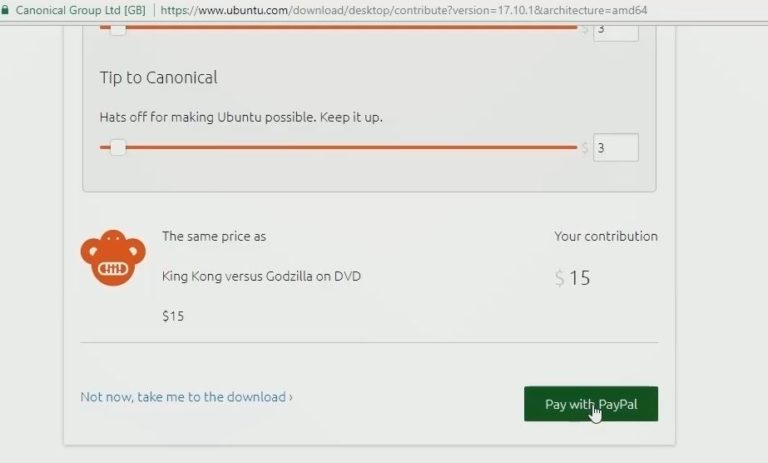
So, if you are interested in donating. You can simply donate some money to them and pay by PayPal.
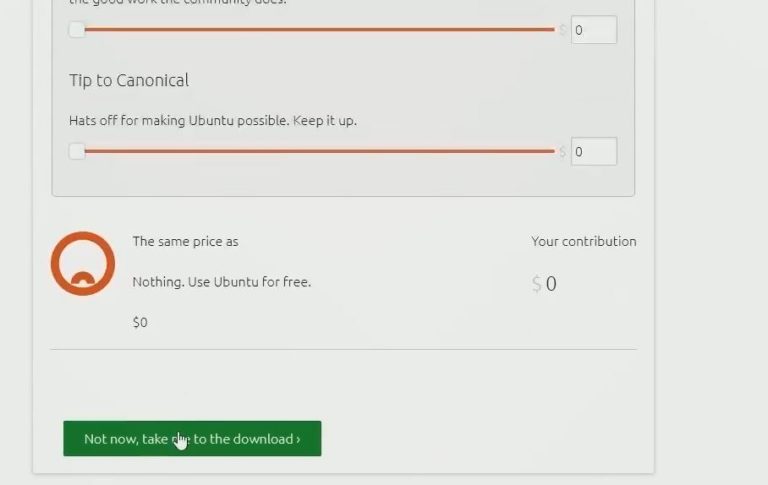
However, it’s always free so you can down it to 0 $ and get free and click on not now take me to download.
However, it’s always free so you can down it to 0 $ and get free and click on not now take me to download.
Then once you have click that it should download ISO file for you down.
Now it's time to install Ubuntu 18.04 LTS Bionic on Windows 10
Now once you have done downloading this file open your virtual box.
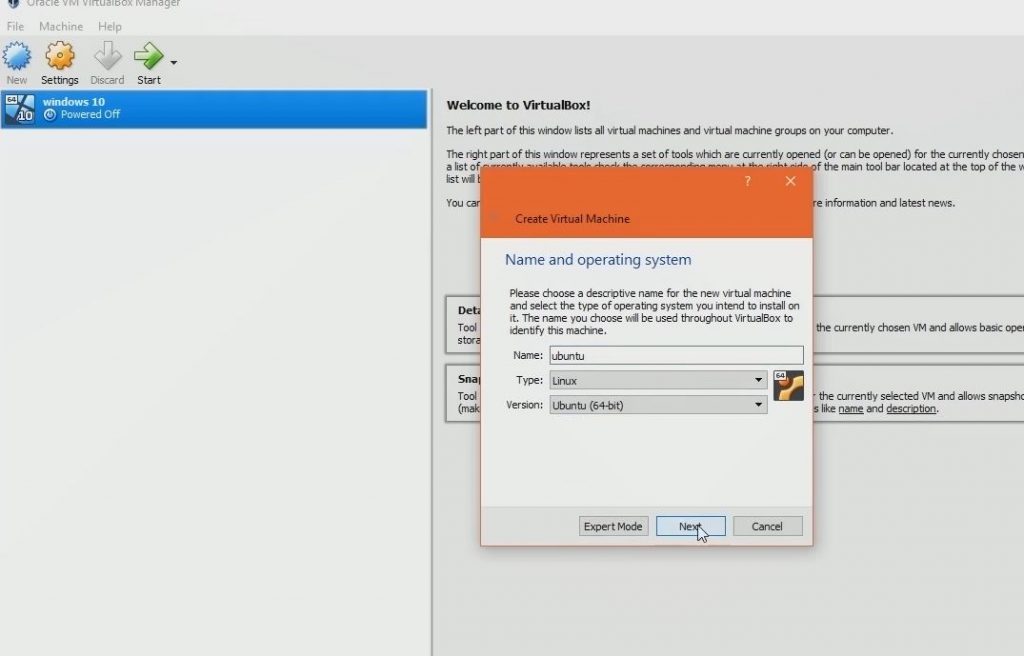
Then click on new and it should popup as create virtual machine then you can simply choose type as Linux and version as 64 bit. Make sure to name as Ubuntu or anything you want then to click on next.
Creating Memory Size
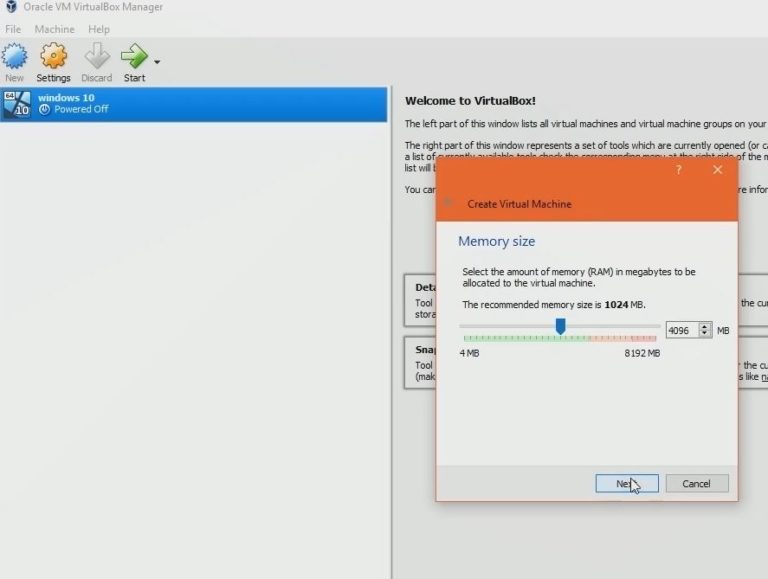
Now once you have done this it will take to you to memory size part. Now it depends upon your computer, the more ram you gave to your virtual machine it will be faster.
Creating hard disk
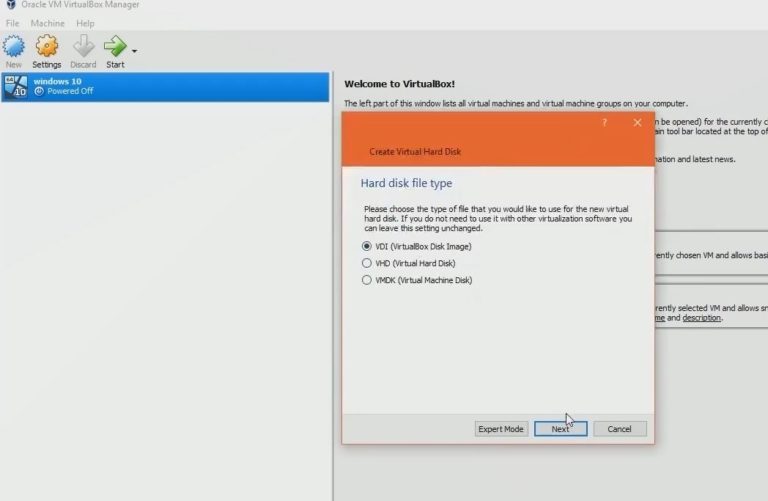
Then next step is to create a hard disk choose on create a virtual hard disk now and click on create then choose hard disk file type as VDI (virtual disk image) then click on next again.
Storage in physical hard disk should be set to dynamical allocated and click next.
Then it will ask you where to store your VDI image file. So you can either leave this default or if you want to keep this to another drive you can do that too.
Now to do this click on yellow arrow icon then you can store anywhere you want. As I have store this to my project drive in Linux folder which is safe.
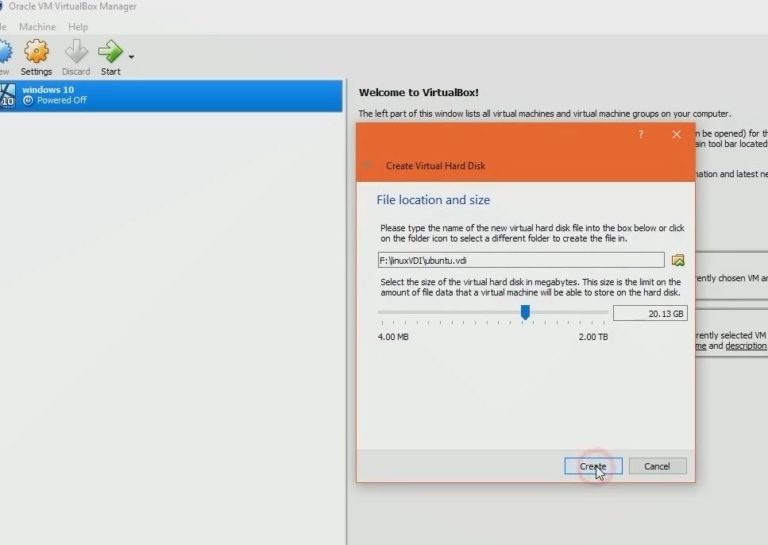
Now just that I also want to save to next drive because I want to install same VDI on my laptop too yes you can do this. And I recommend you do this to get a backup one.
Then once you have done that click on save then increase the size of hard disk it’s up to you. As I’ve given here 20 gigs. Then click on create once you're happy with it.
Setting up to install Ubuntu on Windows 10
Now once you have done that it should create a virtual emulator where you can test anything. Anything I mean by you can test everything you want to do. Like running a bot’s virus and other shits.
So, let’s run it and format it with the Ubuntu 18.04 LTS Bionic operating system. Also, now choose your Ubuntu emulator then click on setting gear icon then go to storage tab.
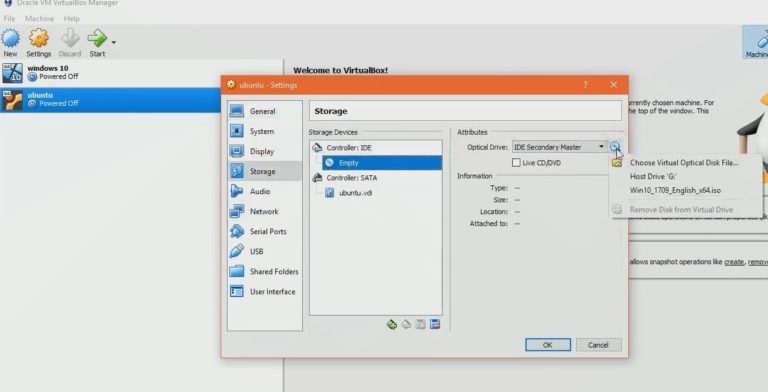
Click on the empty icon then Now to load downloaded ISO file you need to click on CD icon right side then click over choose virtual optical disk file.
Then search up your file where you have downloaded your Ubuntu Linux ISO. And select the ISO then click on open and click on save.
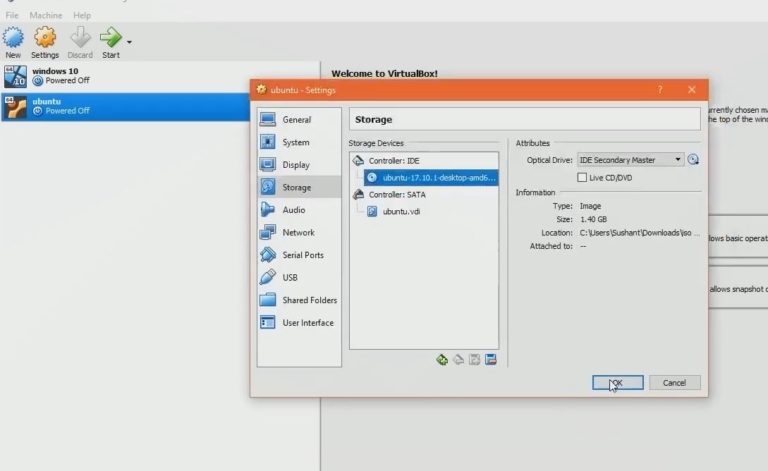
Now as you have ISO on storage it’s time to boot up to install Ubuntu on Windows 10.
So click on the start button to run the setup process. Now, this might take like a bit a time depends upon how much memory you gave to your computer and also it depends upon how many processors you have given while you have setup your emulator.
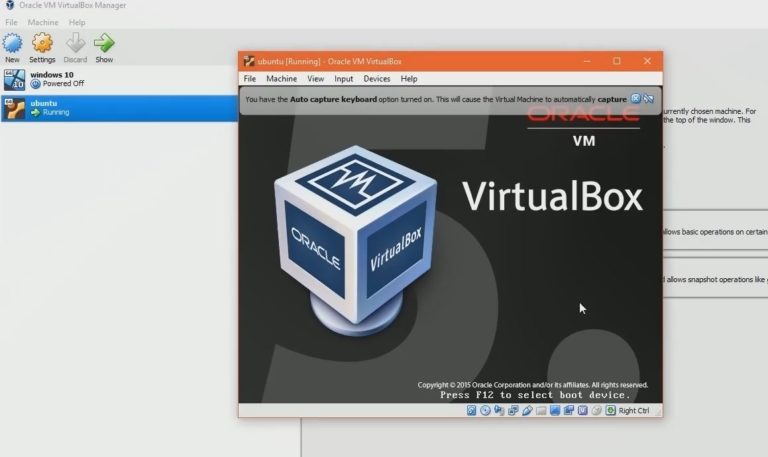
So keep patience until it loads up. Once it successfully loaded click on install Ubuntu.
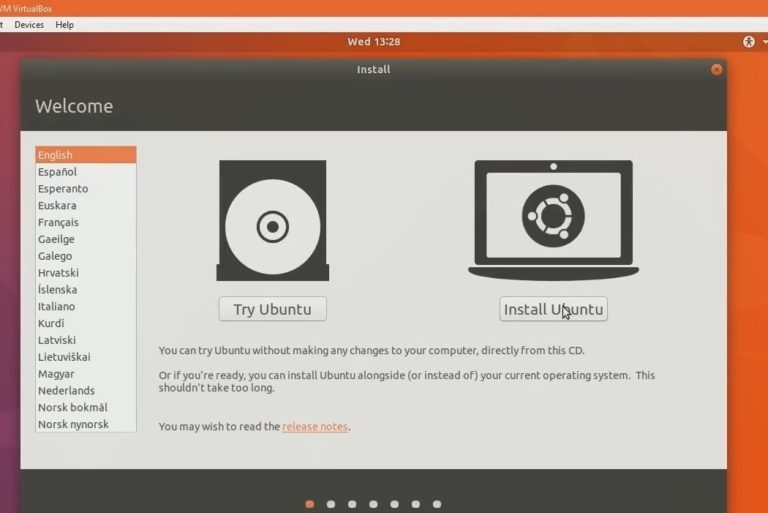
You can uncheck these both if you don’t want to install in a virtual box then click on continue. Now as we are in the virtual box I recommend you to use erase the disk and install Ubuntu option because if you even choose something else it makes no sense. Unless your dual booting it.
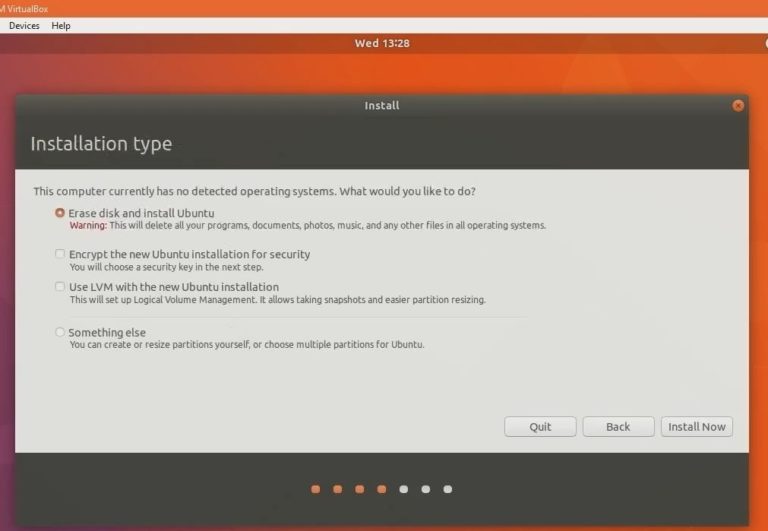
So, for virtual box user simply choose to erase and click on install now button. Now it should warn you that to create changes to virtual disk. Don’t worry this won’t delete anything on your local drive on your PC as we are testing these over virtual disks. So, stay cool and click on continue.
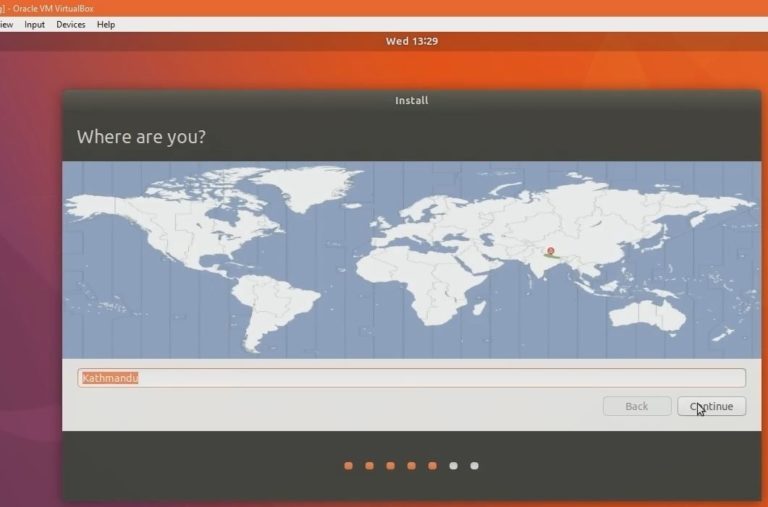
Now choose your country as I am from Nepal I’m choosing my own here. Then choose the keyboard layout after that it will ask your name and create a password. So, create username and password then click on continue.
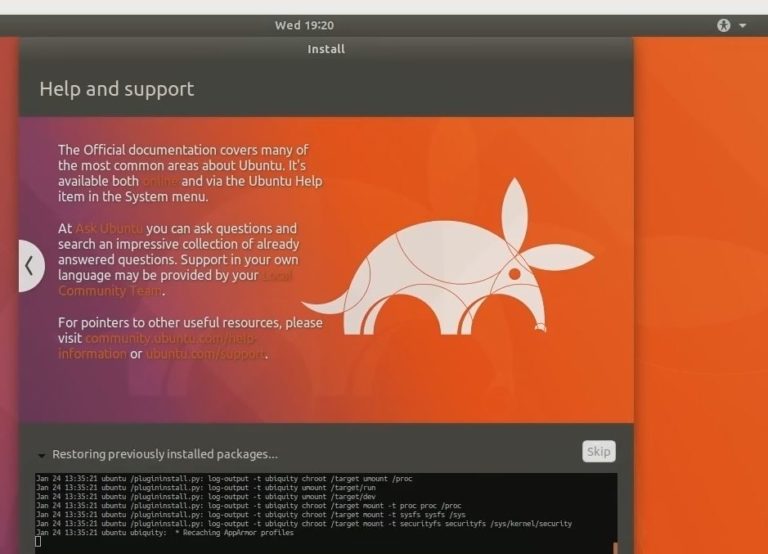
And it should start setting up all the things for you. stay patience until the setup is finished. This might take less than 10-20 mints because you're setting up over the virtual emulator.
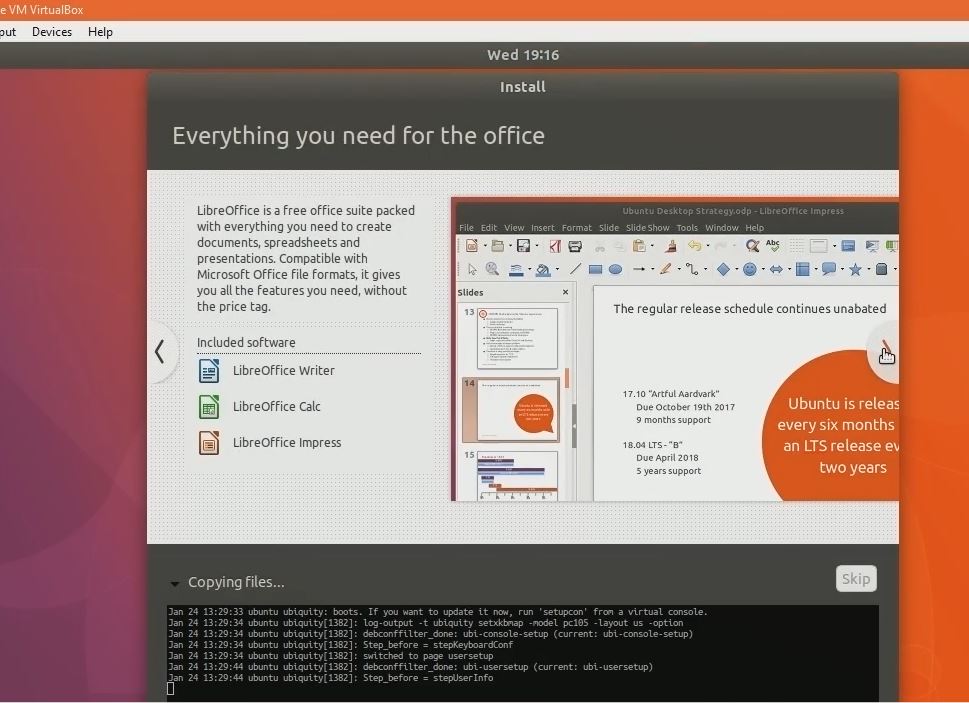
You can see installation is finished to setup now click on restart now button and then click on enter. Now once again it should load up and now input your root password then it should have logged you in and you can see it’s completely booted up.
Congratulation you have successfully installed Ubuntu on Windows 10.
Conclusion
Hurray!!

 Congratulations you have successfully learned How to Install Ubuntu 18.04 LTS Bionic on Windows 10 via Virtual Box. If you have any questions, suggestions, feedback please don’t hesitate to write them in the comment box below because it will help us to improve or correct our contents. Thanks, Happy FOSS Computing.
Read More: “Blockchain: The Tech Changing the Internet”


No comments:
Post a Comment