Some salient features of PyCharm are as follows :
- Syntax highlighting
- Auto-Indentation and code formatting
- Code completion
- Line and block commenting
- On-the-fly error highlighting
- Code snippets
- Code folding
- Easy code navigation and search
- Code analysis
- Configurable language injections
- Python refactoring
- Documentation
We can find the full list of features here. There are many ways to install PyCharm in Ubuntu 18.04 and Linux Mint 19. Here are the following methods to install them :
Install PyCharm with Snap
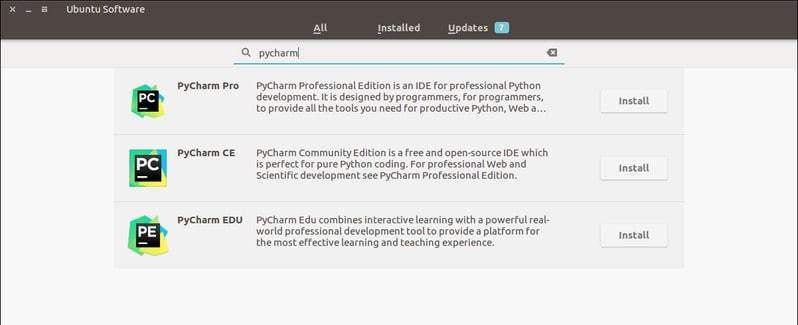
[caption id="attachment_10038" align="aligncenter" width="798"]
 PyCharm is available in Ubuntu Software Center[/caption]
Good news is that PyCharm is available in the Ubuntu Software Center as a Snap package. Which means that you can search for it in the software center and install it from there.
sudo snap install pycharm-community --classic
Install PyCharm with umake
Ubuntu provides a wonderful command line tool, umake for developers. umake lets you easily install a number of development tools in Ubuntu such as Android Studio, Visual Studio Code, Ubuntu SDK, Eclipse, Arudino Software Distribution etc. PyCharm is also one of the development tools included in the umake.
To install PyCharm using umake, you need to have umake first. Normally, it should already be installed in your system, but if it is not, use the PPA below to get the latest stable version of umake:
sudo add-apt-repository ppa:ubuntu-desktop/ubuntu-make
sudo apt-get update
sudo apt-get install ubuntu-make
Once you have umake, use the command below to install PyCharm Community Edition in Ubuntu:
umake ide pycharmTo install PyCharm Professional Edition (you need a license for this), you can use the command below:
umake ide pycharm-professional
To remove PyCharm installed via umake, use the command below:
umake -r ide pycharm
Install PyCharm in Ubuntu and Linux Mint with PPA
We’ll be using an unofficial PPA to easily install PyCharm in Ubuntu. I am using Ubuntu 15.04 but this PPA is also available for Ubuntu 14.04. You can use the same method to install PyCharm in Linux Mint 17, elementary OS Freya and other Ubuntu-based Linux distributions. PyCharm uses Java so make sure to install Java in Ubuntu beforehand.
Open a terminal and use the following commands:
sudo add-apt-repository ppa:mystic-mirage/pycharm
sudo apt-get update
To install the community edition of PyCharm, use the command below. It will download data of around 120 MB.
sudo apt-get install pycharm-communityTo install the professional edition of PyCharm, use the command below. It will download data of around 160 MB.
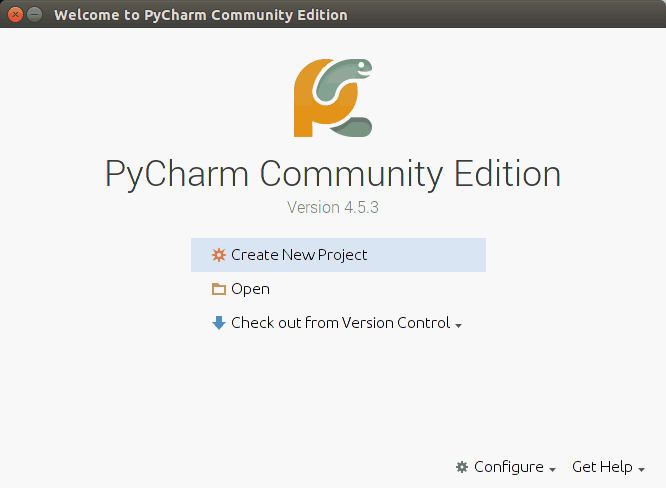
sudo apt-get install pycharmOnce installed, go to Unity Dash and search for PyCharm and you should be able to see it running. This is what it looked like on my Ubuntu 18.04:
Remove PyCharm
If you used Snap command, you can uninstall it either from the Software Center or by using the command below:
sudo snap remove pycharm-communityTo uninstall PyCharm installed by the above-described method, use the command below to uninstall the community edition of PyCharm:
sudo apt-get remove pycharm-communityTo remove the professional version, use the command below:
sudo apt-get remove pycharmAfterward, use the command below to remove the PPA from the sources list:
sudo add-apt-repository --remove ppa:mystic-mirage/pycharm
Conclusion
If everything went correctly as described above, you must have your PyCharm running. In these three methods, you can follow whichever method you want. If you have any queries, suggestions, comments, please do comment down below. If you have any questions, suggestions, feedback please don’t hesitate to write them in the comment box below because it will help us to improve or correct our contents. Thanks, Happy FOSS Computing. ?
Read More: “How to install the latest MongoDB 3.0.1 on RHEL or CentOS 7”


No comments:
Post a Comment